タブコンテンツ1(オレンジ線下から)
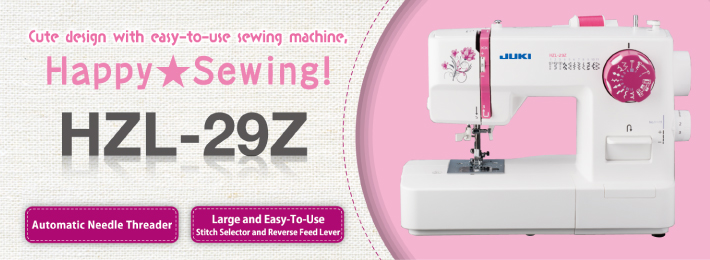
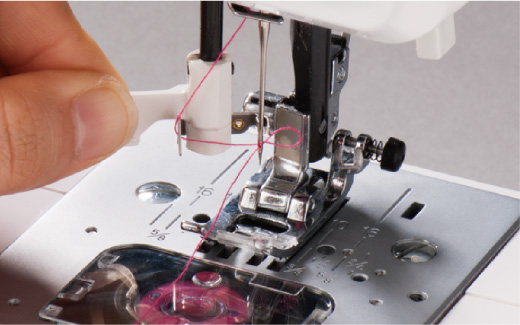
Automatic Needle Threader
Simply lower the lever and turn it back and forth. This single action makes it easy to thread the needle.
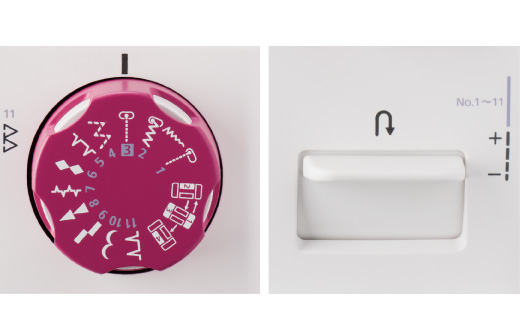
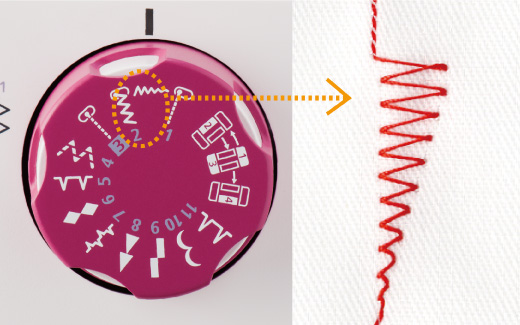
Large and Easy-To-Use Stitch Selector and Reverse Feed Lever
Stitch patterns can be selected by the large, easy to operate dial. The Reverse Feed Lever is also conveniently larger for simple operation.
Brightens the needle entry area. LED light will not heat up even during long operations. Also since LED light has a long life and low power consumption compare with halogen light, it is more economical.
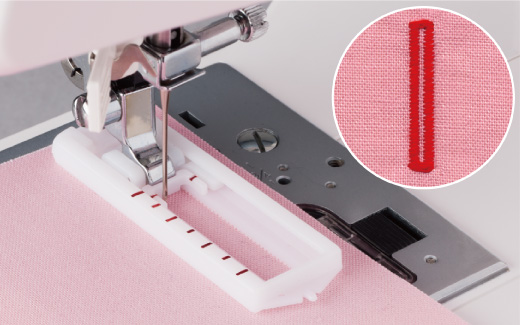
Buttonholes can be sewn neatly with 4 easy steps.
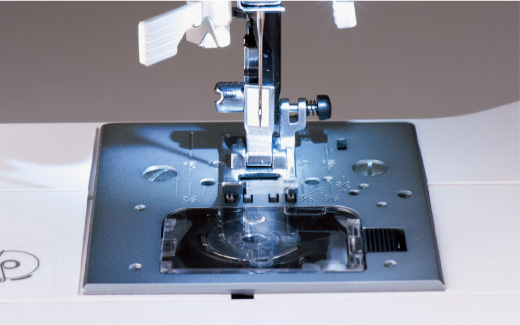
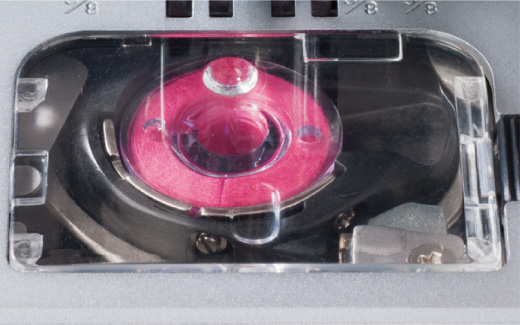
It is simple to prepare the bobbin thread and to clean the hook area. The remaining amount of bobbin thread is visible through the transparent cover.
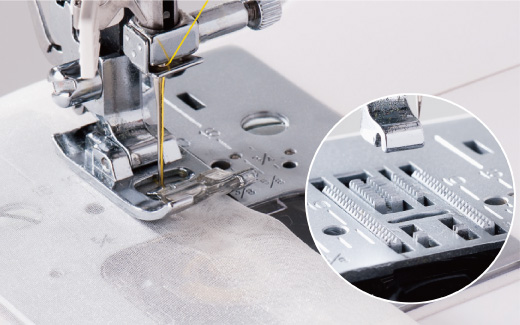
From light-weight material to denim. 2 extra Feed Dogs are located in front of the needle entry hole. With the 7-point feed dog the machine feeds any light weight to heavy weight materials consistently.
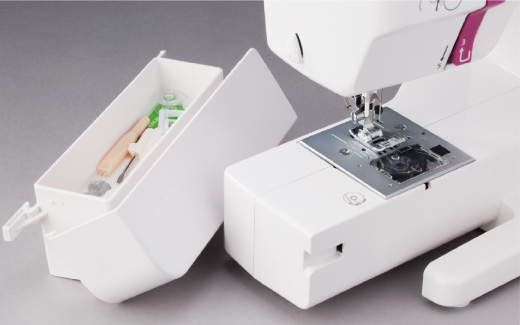
The accessory box slides off for free arm sewing. Standard accessory parts can be neatly stored in the box.
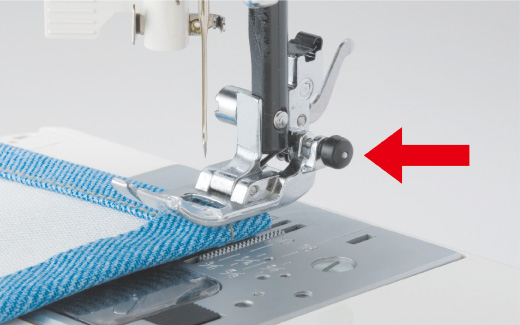
Push the black button at the presser foot and make it parallel to the throat plate. This makes it easy to start sewing multiple layers of fabric or overlapped materials.
Changeable Needle Positions
Zigzag width can be adjusted by simply turning the Stitch Selection Dial. For straight stitches, either the left or center needle position can be selected.
タブコンテンツ1(オレンジ線上まで)
タブコンテンツ2(オレンジ線下から)
| Control system(Arm size) | Electric (Arm Size 138㎜) |
| Dimensions | 388(W) x 280(H) x 198(D)mm |
| Maximum sewing speed | 610 sti/min |
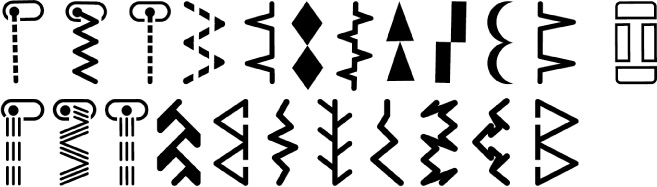
| Number of stitch patterns | 23 |
| Buttonhole | 4-step Buttonhole
Buttonhole Length: - 3.0cm |
| Direct stitch pattern selection | - |
| Adjustable starting / reverse stitch speed | - |
| Automatic needle threader | 〇 |
| Thread tension system | Standard |
| Low-speed inching sewing | - |
| Needle stop position switching | - |
| Lock stitch | Reverse stitch (Lever system) |
| Feed mechanism | 7 point feed dog |
| JUKI Smart Feed (dual feed function) | - |
| Presser foot pressure adjustment | - |
| Auto presser foot lift system | - |
| Function to straight-line stitching | - |
| Presser foot pivot function | - |
| Presser foot lift (1 step/2 steps) | Lever system: 5.5mm / 9.5mm |
| Horizontal presser foot holder button | 〇 |
| Quick bobbin preparation | - |
| Easy bobbin winding (Bobbin winder with independent motor) | - |
| Stitch length | Dial system
Max. 4mm |
| Stitch width | Dial system
Max. 5.5mm |
| Number of needle position (straight stitch/other than straight stitch) | 2 / - |
| Type of hook | Horizontal hook |
| Accessory storage | Auxiliary bed |
| Sewing machine cover | Dust cover |
| Accessories (presser feet) | Standard presser foot
Buttonhole foot |
| Other accessories_1 | Bobbins
Needles
Spool pin cap
Vertical spool pin
Felt
Seam ripper/Brush
Screwdriver (small)
Screwdriver
Dust cover
Power cord(Foot controller)
Instruction manual
Operation support DVD |
タブコンテンツ2(オレンジ線上まで)
タブコンテンツ3(オレンジ線下から)
タブコンテンツ3(オレンジ線上まで)